Recently a customer asked me how to import his private key
and certificate into an Oracle HTTP Server Wallet.
The customer generated a CSR outside the OHS Wallet Manager,
using Open SSL, and sent it to a CA to get his certificates issued by them.
Unfortunately, the Wallet Manager only allows you to import
certificates which were created for a CSR generated by the Wallet itself.
Despite this minor limitation, there is a workaround to get
your private key, certificate and CA trusted certificates chain into Oracle
Wallet.
This post explains the simple steps to achieve this, with a
little help from Open SSL.
1.
What you will need:
a. openssl
installed in a machine
b. The server’s certificate (PEM format)
c. The server’s encrypted private key and it’s
password
d. The CA root and intermediate certificates (these
must be concatenated into a single file, also in PEM format)
2. On a server with openssl installed, issue the
following command:
openssl pkcs12 -export -in certfile -inkey keyfile -certfile cacertfile -out ewallet.p12 |
certfile: is the server’s certificate
keyfile: is the server’s
private key
cacertfile: is the CA’s
concatenated root and intermediate certificates.
Note that the resulting file must be named
ewallet.p12 in order to be recognized by Oracle Wallet Manager.
3 3.
Enter the private key's passphrase when prompted
for it.
4. Enter an export password when prompted for it.
You MUST supply a non-blank password. You will need to type it again as
verification.
5.
Upload the ewallet.p12 file to the Oracle
Application Server. Move it to where the OHS can access it.
6.
Start the Oracle Wallet Manager application.
7. Under the Wallet menu, click Open.
8. You will likely receive an error message about
the default wallet directory not existing, and asking you if you want to
continue. Click Yes.
9.
You will be asked to select the directory where
the wallet file is located. Find the directory where you moved the file
ewallet.p12 to.
10.
You will be asked for the wallet password. Enter
the export password you entered when converting the certificate.
11.
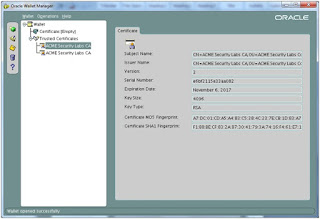
The wallet should open, and the certificate may
be displayed as "empty" – don’t worry about that right now. You should also see
the CA certificate under "Trusted Certificates".
12.
Under the Wallet menu, select "Auto
Login". Verify that it was selected by viewing the Wallet menu again; the
Auto Login box should now have a check mark.
13. Under the Wallet menu, select "Exit"
to quit the Oracle Wallet Manager application.
14.
Now you should have 2 files in the directory:
ewallet.p12 and cwallet.sso. Both files must be together at the same directory
so the OHS can access the wallet.
15.
Shutdown OHS.
16.
Modify your OSH ssl.conf (default location
should look something like /home/oracle/Middleware/Oracle_WT1/instances/instance1/config/OHS/ohs1/ssl.conf)
so the directive SSLWallet points to the directory where you saved both files, for example:
SSLWallet
"${ORACLE_INSTANCE}/config/${COMPONENT_TYPE}/${COMPONENT_NAME}/keystores/default"


No comments:
Post a Comment
Note: Only a member of this blog may post a comment.